Looking for a new cooking challenge? This tutorial on how to make pie crust is perfect for anyone who hasn't before and wants to try.
When I was a young mother in my late 20s in Connecticut, my cousin was well known in the family for making the best pies. People would rave about her perfect pie crusts, and as I built a career in food I wanted to learn. Making pie wasn't something that was done in my home growing up, so I worked up the courage and asked my cousin for her recipe and advice.
Pillsbury Pie Crust, she told me.
And for nearly two decades, that's what I used. The longer that passed without me making my own dough, the bigger and harder a prospect it became in my mind. It wasn't just that I didn't know how. It was that I was scared to try and fail.
Well, I am here to tell you: making pie crust is easy. Really, truly easy.
The first time I made my own crust was around the holidays in 2022. I texted a family friend for her recipe on dark and lonely night and made it immediately. It was supposed to be for our Thanksgiving pies at our big family celebration, but in the end only my sister, kids and I ended up eating it. Everyone else was home sick.
After that, I knew I could make it but didn't. As I worked on subsequent books, I continued to use premade pie crust because that had been the reliable dough in so many recipes over the years. And yet, I knew that homemade was indeed better.
There are two factors in one's ability to overcome cooking fears: willingness to try and availability of time and mental space. As my kids wrapped up their high school careers and went off to college, I finally had both.
And that, my friends, is how I came to make pie crust again and realize how easy it is and how much I prefer it to store-bought. Plus, it's so much less expensive when you make it at home. So this is my advice to the pie-curious and pie-anxious: you can do it. It's not hard. And it's totally worth it.
Shall we get on with it now? Let me show you.
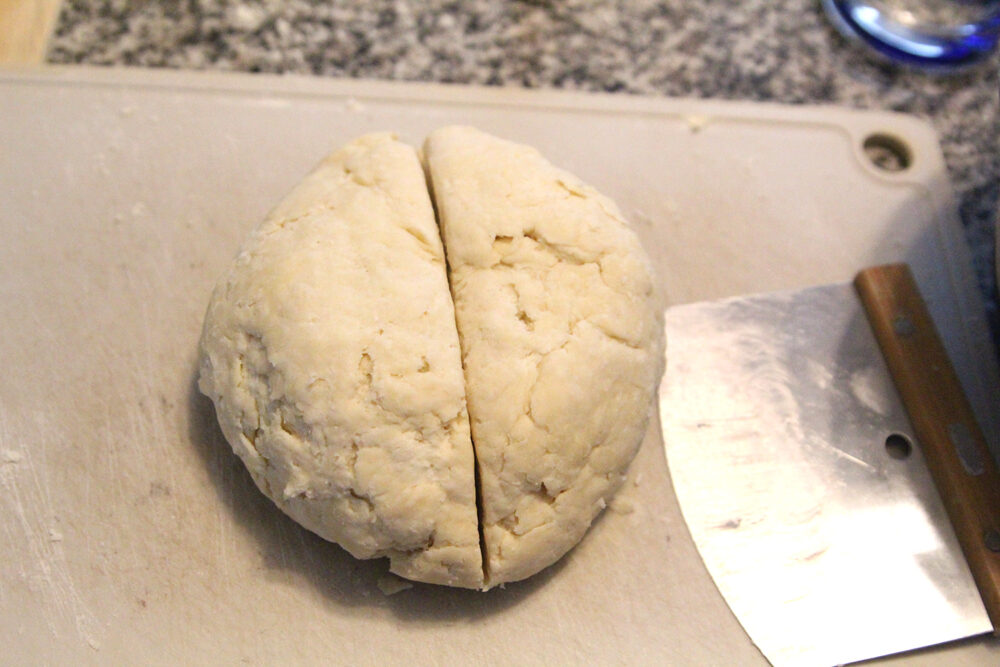
With only four ingredients, making pie crust is one of the simplest things you can do. And it essentially only has a few steps: mix cold butter into a flour/salt mixture. Use two knives or a pastry cutter to cut the butter into the flour mixture. Add just enough water to get it all to hold together. Knead it into a ball. Cut it in half and pat it into disks.
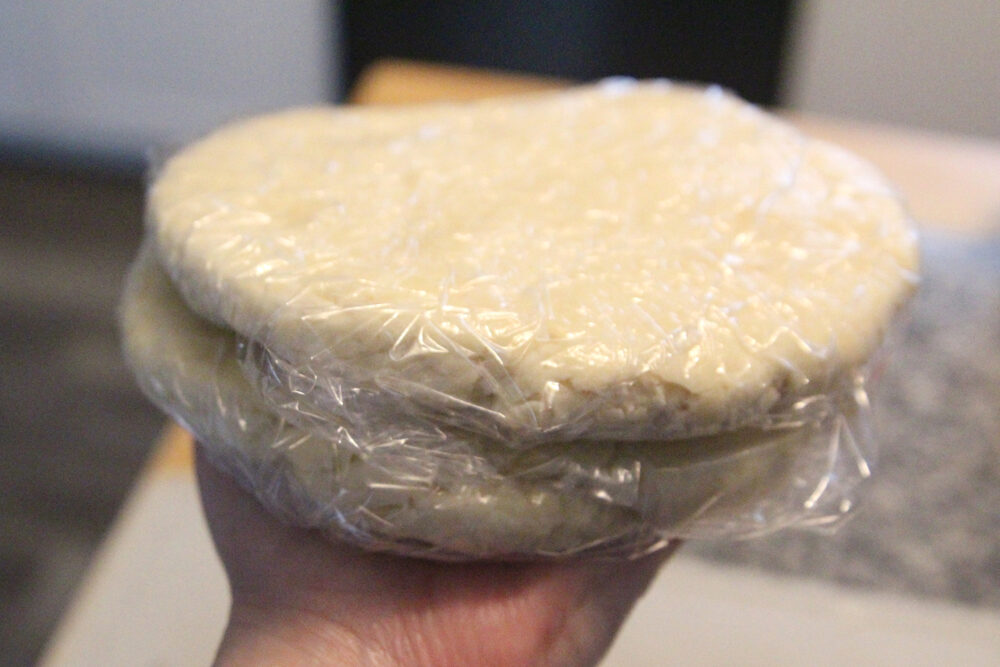
Though dough disks are each one pie crust and should be wrapped in plastic wrap and left to rest in the fridge for at least two hours.
In short, the whole process can be described in a single, short paragraph. That should give you a sense about how easy it really is— even if you are nervous about it.
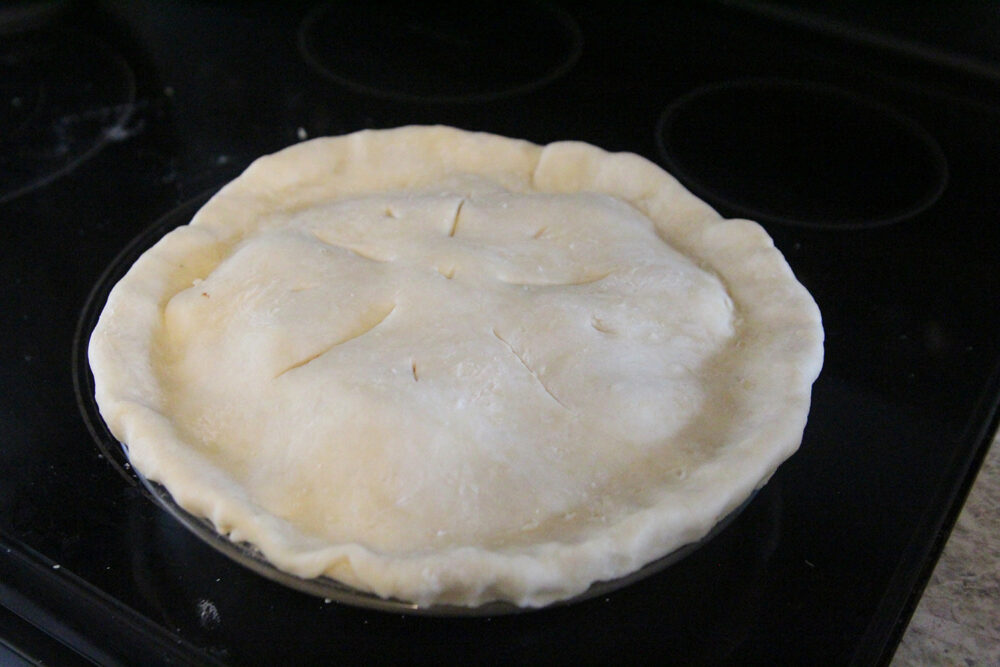
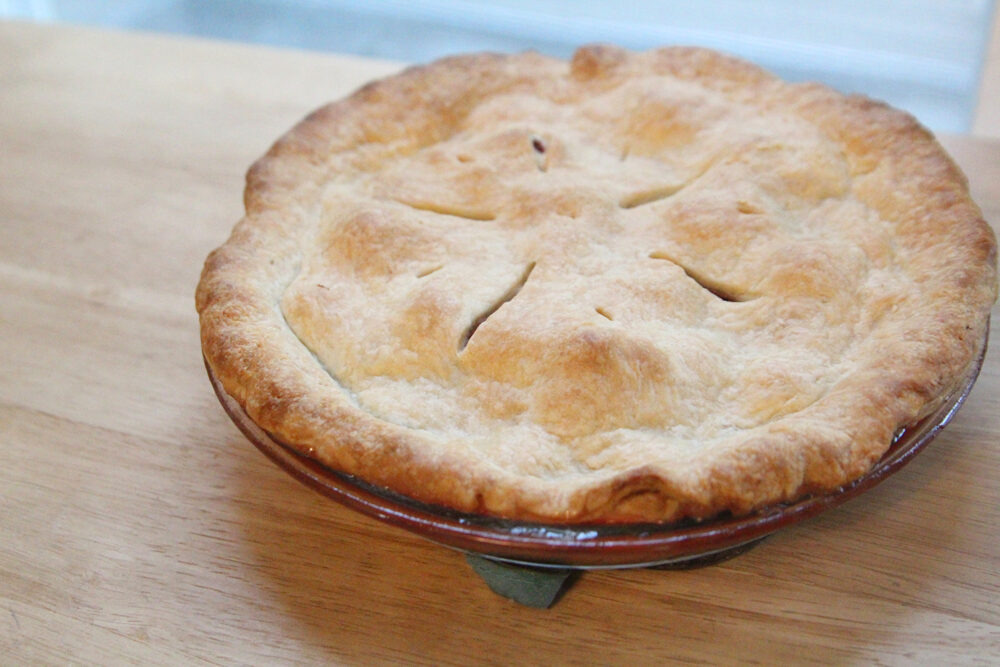
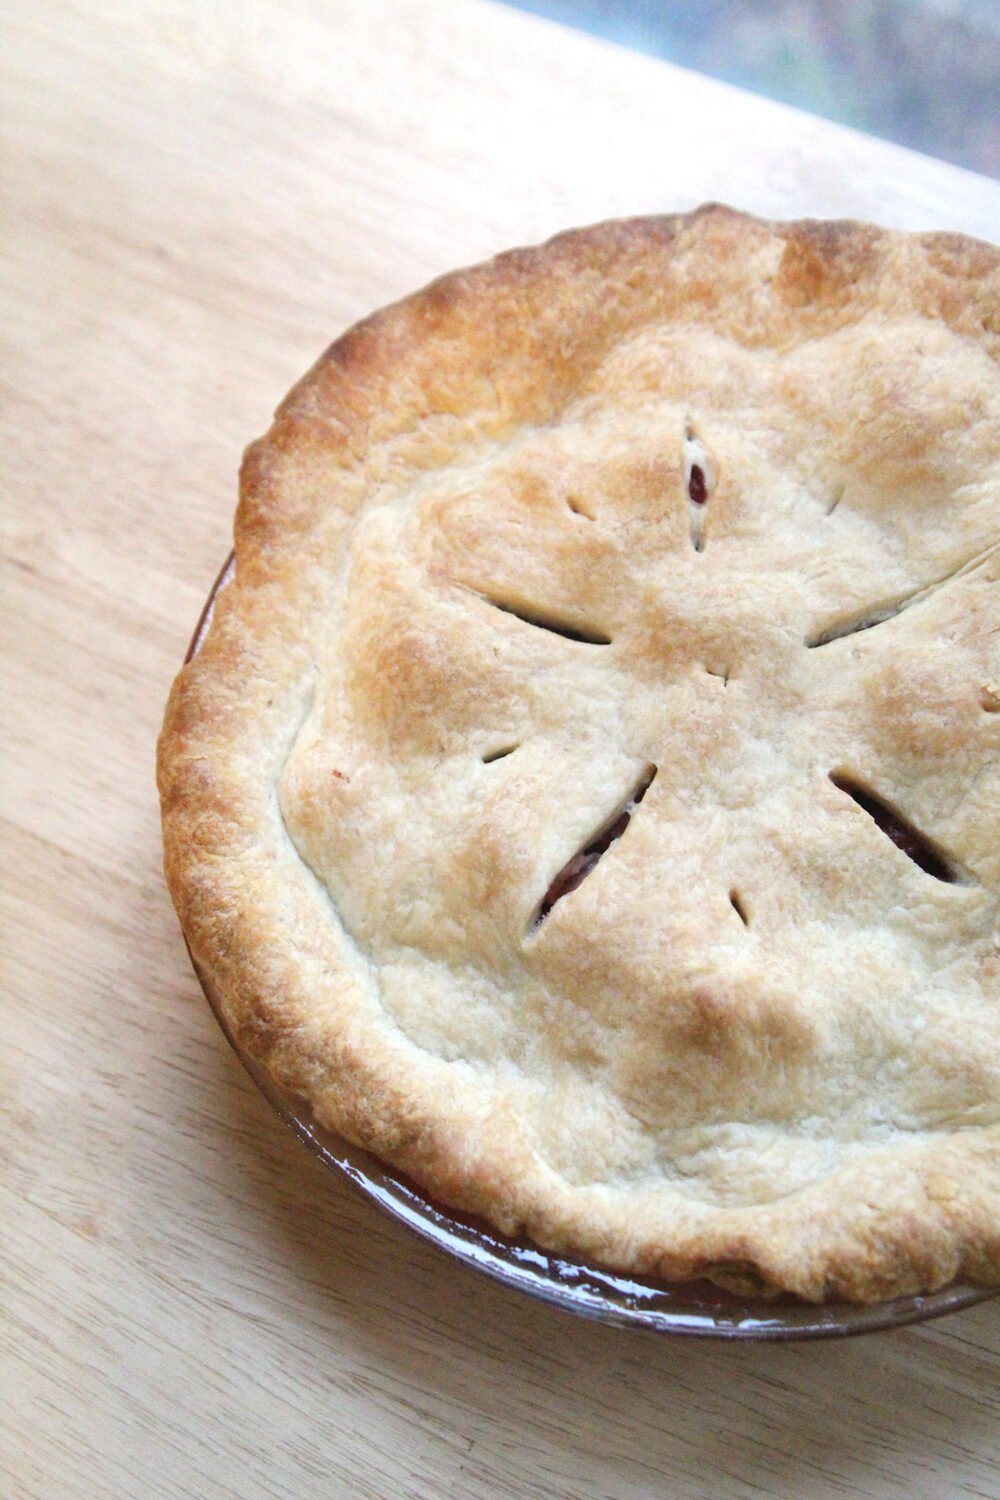
Once the dough has rested, it can be used as desired. Roll it out to make a one- or two-crust pie, for instance. Make turnovers. Top a chicken pot pie. So many possibilities, right?

Easy Pie Crust
This vintage pie crust recipe is as easy as they come. It's Amy Dow's Pie Crust, from the cooking column of Mildred Brown Schrumpf in the Bangor Daily News in 1953. The resulting crust is wonderfully flaky pie crust and so easy to make by hand, if you have the patience for it. The trick is to add only enough cold water for it to hold together. The original recipe called for lard as the fat and didn’t specify the amount of cold water. I’ve updated it to use butter, and found just the right amount of water for this
Ingredients
- 3 cups sifted all-purpose flour
- 1 teaspoon kosher salt
- 1 cup unsalted butter, cold (2 sticks or ½ lb)
- ½-¾ cup cold water
Instructions
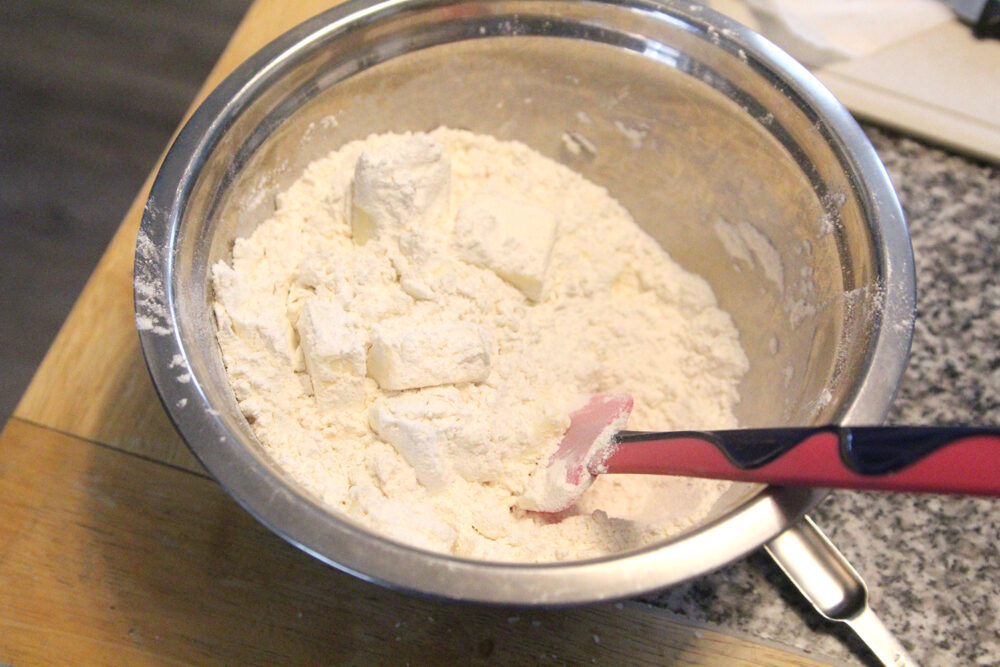
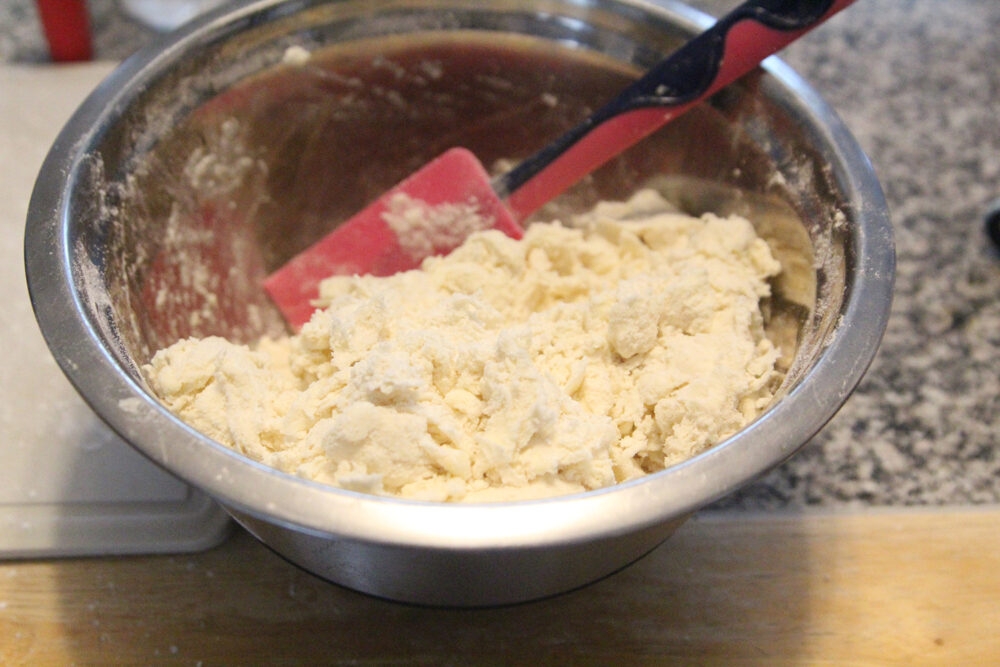
- In a large mixing bowl, mix together the sifted flour and the salt. Cut the butter into 1-tablespoon slices and add to the bowl. Stir to coat the butter pieces with flour. Then use either 2 knives or a pastry cutter to cut the butter into the flour until the butter is in small pieces, no bigger than peas.
- Add the cold water to the bowl 1 tablespoon at a time, mixing after each addition, until the dough just holds together when squeezed. You may not use all the water. Discard any excess.
- Turn the dough out onto a floured board and with clean hands, knead the dough together to form a ball. Cut the ball into two even pieces. Working with one at a time, form a ball and then pat it out into a disc, about 6-inches in
diameter. - Place each onto a plastic wrap rectangle and wrap to seal. Chill for at least 2 hours before using.
Notes
When you're ready to bake the dough, the column noted that brushing the crust with milk will result in a nice golden brown. I haven't tried this but it might be something to experiment with.