Good carrots make good roasted carrots. This recipe for Roasted Carrots with Garlic and Herbs gives carrots a decidedly savory flavor with robust garlic and a trio of herbs.

This shop has been compensated by Collective Bias, Inc. and its advertiser. All opinions are mine alone. #SealToSavor #CollectiveBias
When Will said he wanted to plant carrots this growing season, I very nearly said no. Years ago I tried to grow carrots in a garden but after months and months of waiting, I only had itty bitty carrots to harvest -- so small it's debatable whether they could be called carrots at all.
But I agreed, and we planted carrots.
I am so, so glad we did. Carrots thrived in our airy soil and gave us a wonderful, robust crop. We'll definitely be planting them again next year and perhaps even exploring different varieties when we do.
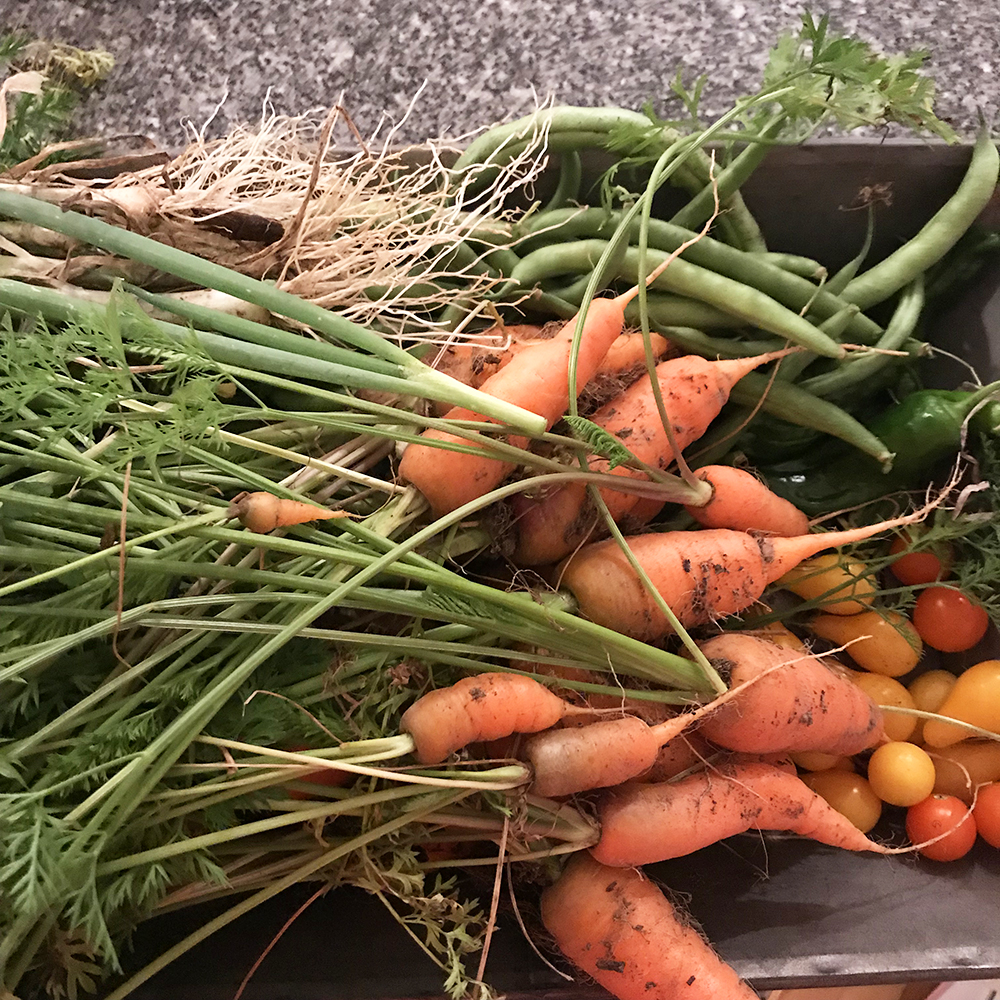
Pictured here is what we recently harvested from our garden plot. My kids – Will is 13 and Paige is 10 – have spent the last several months plucking carrots from the garden, rinsing the dirt off and eating them Bugs Bunny-style. That alone made growing the carrots worth it. But we also left many to mature further too.
Of course, we aren't just eating our carrot harvest straight from the ground. Carrots have made appearances in salads, rice bowls, side dishes and more.

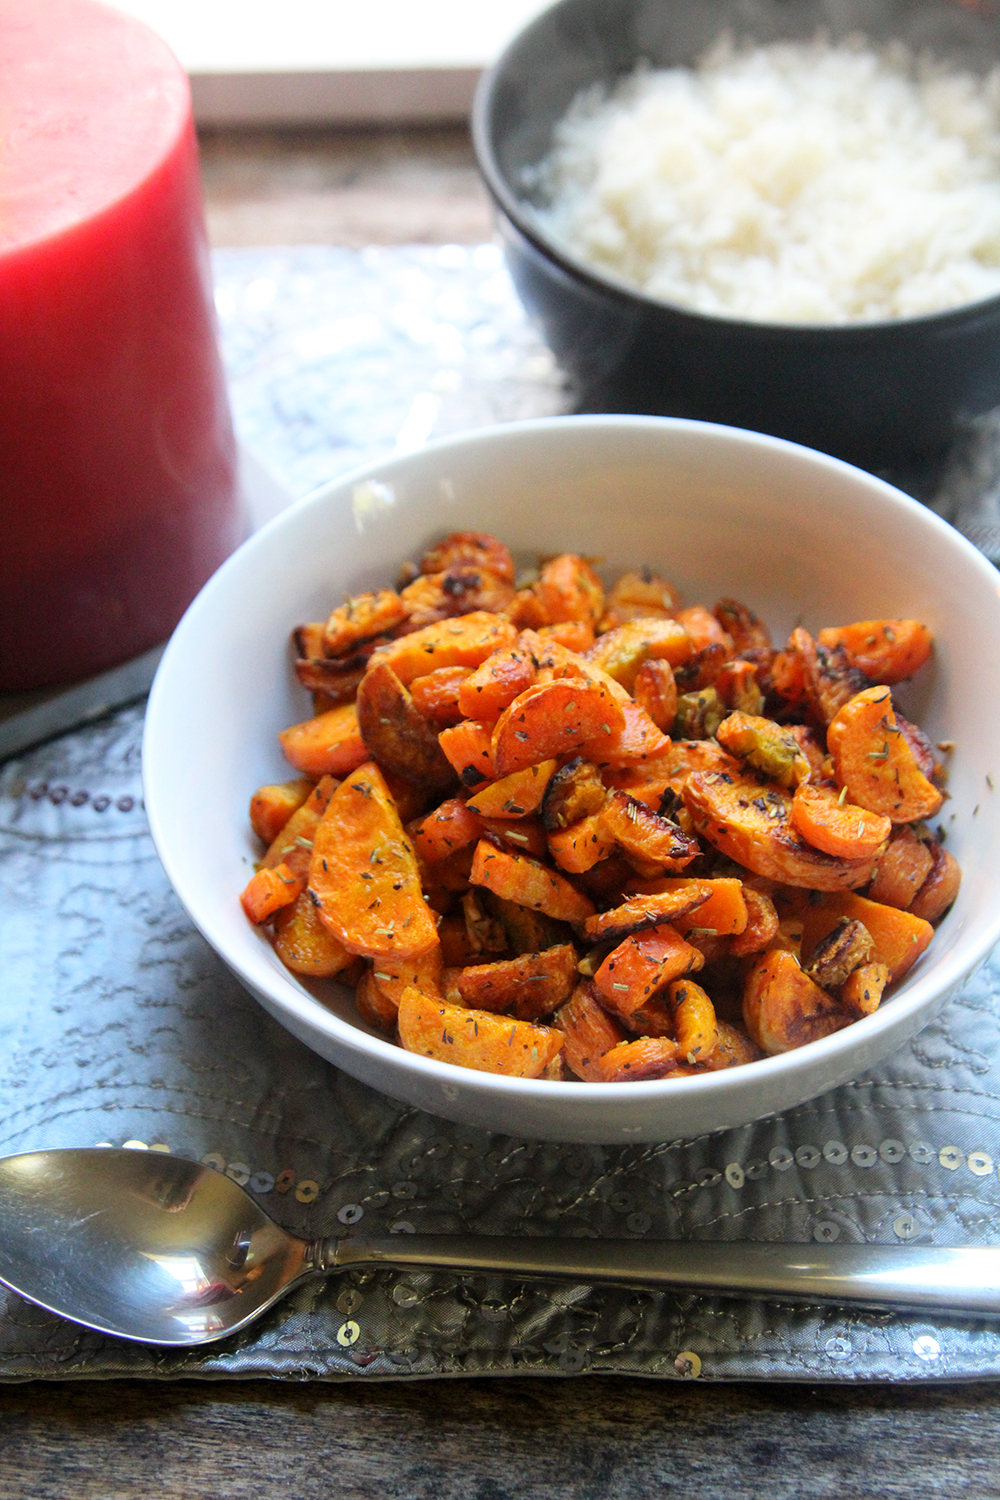
And now, we're adding Roasted Carrots with Garlic and Herbs to that list of ways we're enjoying our harvest. It's a delightful side dish that pairs wonderfully with chicken, rice, mashed potatoes and more. But this recipe is also special because you can either make and eat it immediately or use it as a make-ahead and save recipe. And saving it is a great idea – who doesn't want an easy, homemade side dish that just needs to be heated and served?
Saving Food
Winter is coming. No, really it is. And that means that fresh produce will be harder to find here in Maine. Though storage crops like squashes and potatoes will be available through the winter, preserving foods at their peak freshness (now!) means you can enjoy the best flavors even when they aren't available just harvested anymore.
I've been putting up foods – both from our harvest and from the farmers market – to enjoy when we no longer can get them fresh. My cabinet is overflowing with canned dilly beans, pickles and applesauce with honey.
My primary way of storing foods is by water-bath canning, which works with pickled foods, jams with the right acidity content and applesauce (with acid added). And having those jars of fresh, homemade food will come in handy when winter sets in. Each one is like a whisper of warmer days to come.
But I also want to save veggies that aren't pickled for side dishes and soups. And that's where freezing comes in. When you freeze veggies at their peak freshness, you can enjoy them later in the year and get that robust flavor.
Of course, freezing in resealable bags is a flawed concept – how many times have you carefully frozen something just to have freezer burn set in? I can't begin to count how many times that's happened to me.

Fortunately, there's a better way and that way involves sucking all the air from the bag before sealing and freezing.
Recently, I was sent the FoodSaver® FM5200 Vacuum Sealing System and the FoodSaver® 11" x 16' Vacuum Seal Roll, 2 Pack. I've owned FoodSaver® vacuum sealers before and found them handy for portioning and saving foods. Now I am using this new machine to help me store fresh veggies for eating this autumn and winter.
How to Seal Food with the FoodSaver®
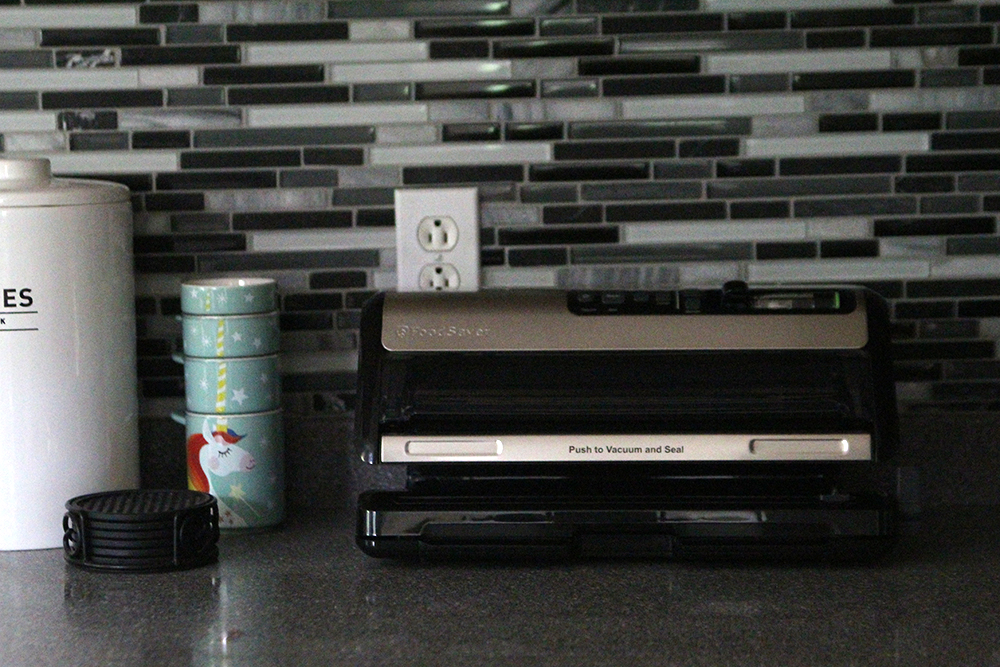
Are you familiar with the FoodSaver®? It is a machine designed to help you store foods better. The FoodSaver® FM5200 is a newer design that makes creating bags and vacuuming sealing easier than ever – seriously, the Express Bag Maker is a pretty awesome time saver with less steps to use it.

Using special food saver plastic rolls stored inside the machine, you make bags, fill them with food, suck the air out and then seal them tightly. Doing so can keep food fresh up to five times longer, according to the company, as well as prevent freezer burn on foods. FoodSaver® bags are multi-layer, BPA-free vacuum-seal bags that are flexible enough to hug food and seal effectively without gaps.
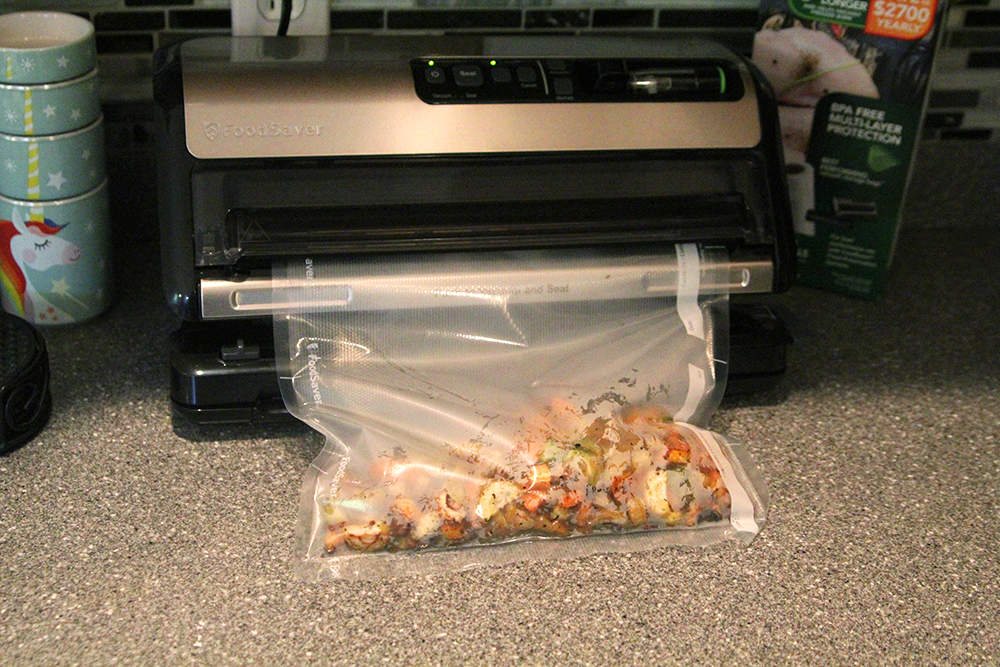
Once you've made your bag, you fill it with food. Here, I used the food saver to seal a batch of Roasted Carrots with Garlic and Herbs, which I will defrost and serve at another time. Imagine how easy this could make entertaining – whip up dishes ahead of time and then freeze them until you're having people over.
With a tap of the bar (by pressing at both ends), the machine sucks the air from the bag and then seals the plastic.

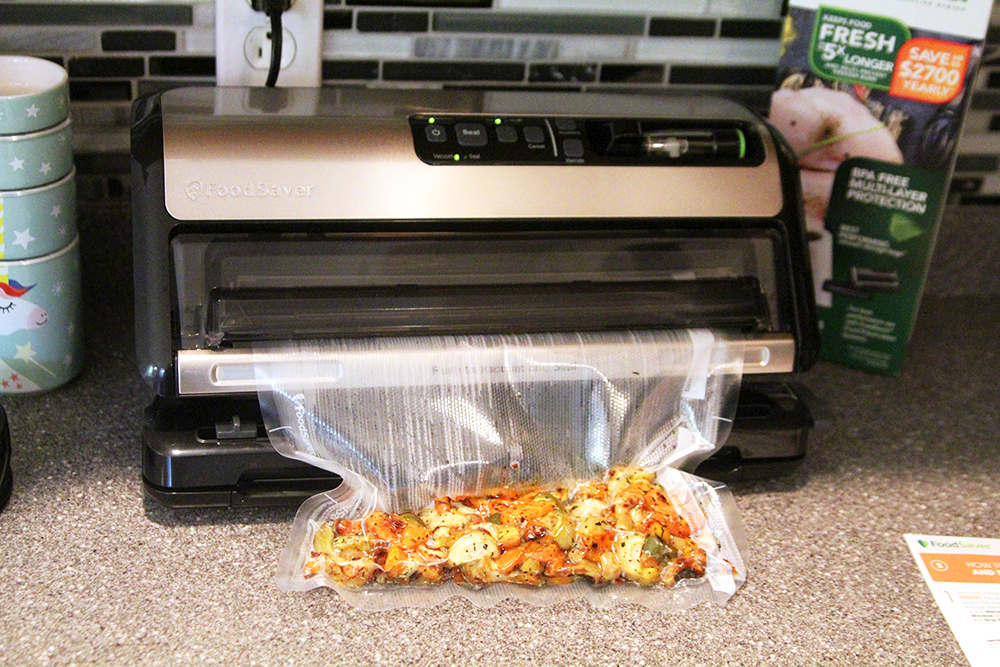
This is now ready to be frozen. Pretty awesome to make my own frozen foods at home, right?
Not only does this mean that you can cook ahead and save foods for later (like the Roasted Carrots with Garlic and Herbs, which I cooked and then sealed and froze) but you can also use it with special containers to marinate food. When you suck the air from the marinating container, the marinating process takes minutes instead of hours.

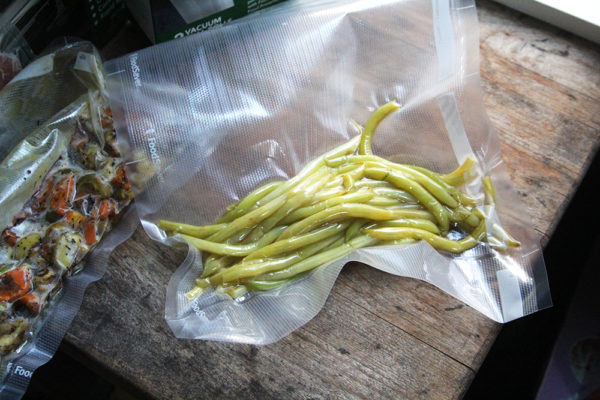
It can also be used to store fresh veggies like these wax beans. Simply blanch the veggies, rinse with cold water, dry completely and then seal in a bag for storing. Easy peasy. And it means less waste. I bought these beans for a meal but ended up not using them. By blanching and saving them for later, I can ensure that we will eat them when we're ready.
(Do I sound like a commercial? I mean, this has been seen on TV, but I really do love this machine. The benefits of investing in one, particularly when you are growing veggies like we are, are huge.)
Making Roasted Carrots with Garlic and Herbs
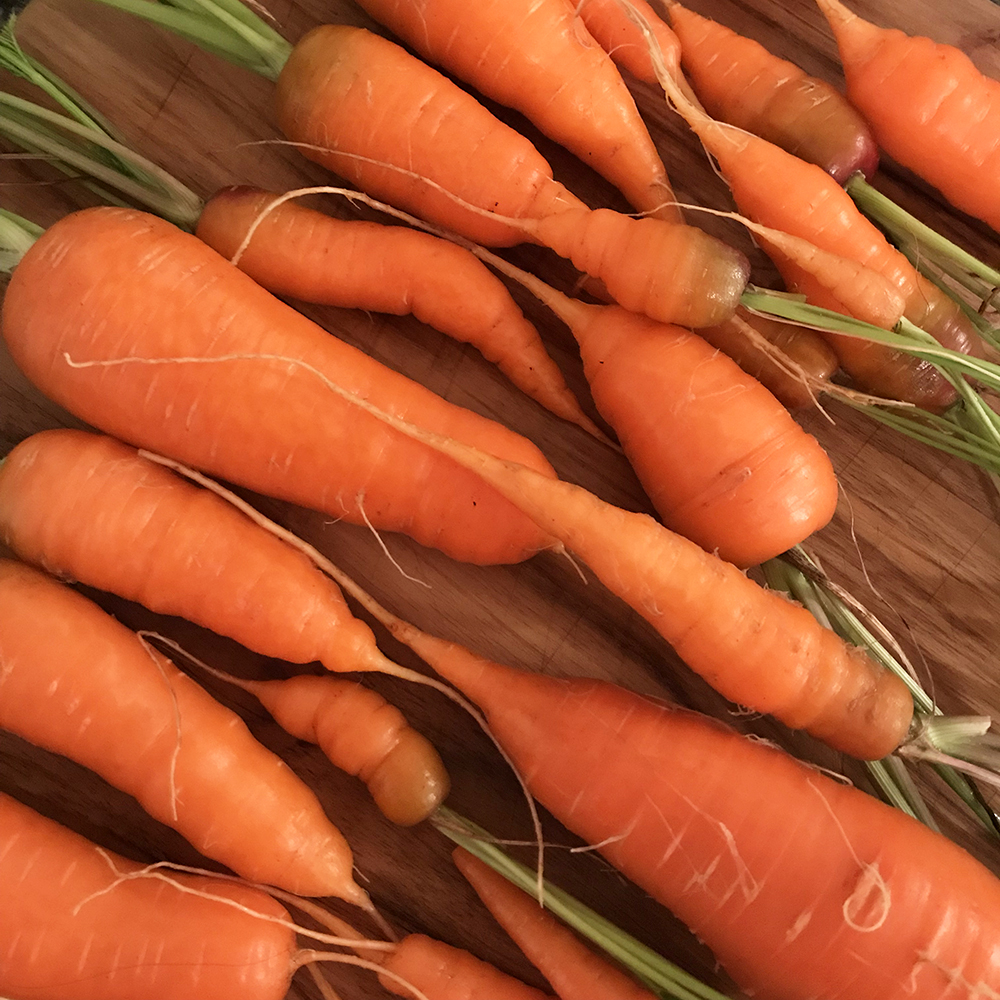
Fresh carrots – like these from our garden and the lovely multi-hued ones I've picked up at the farmers market – come in
Start by cutting the carrots. Slice them in half length-wise and then cut them into half-moons. mine were between ¼-inch and ½-inch thick, depending on how large in diameter the carrot was (¼-inch thick for the widest ones!).
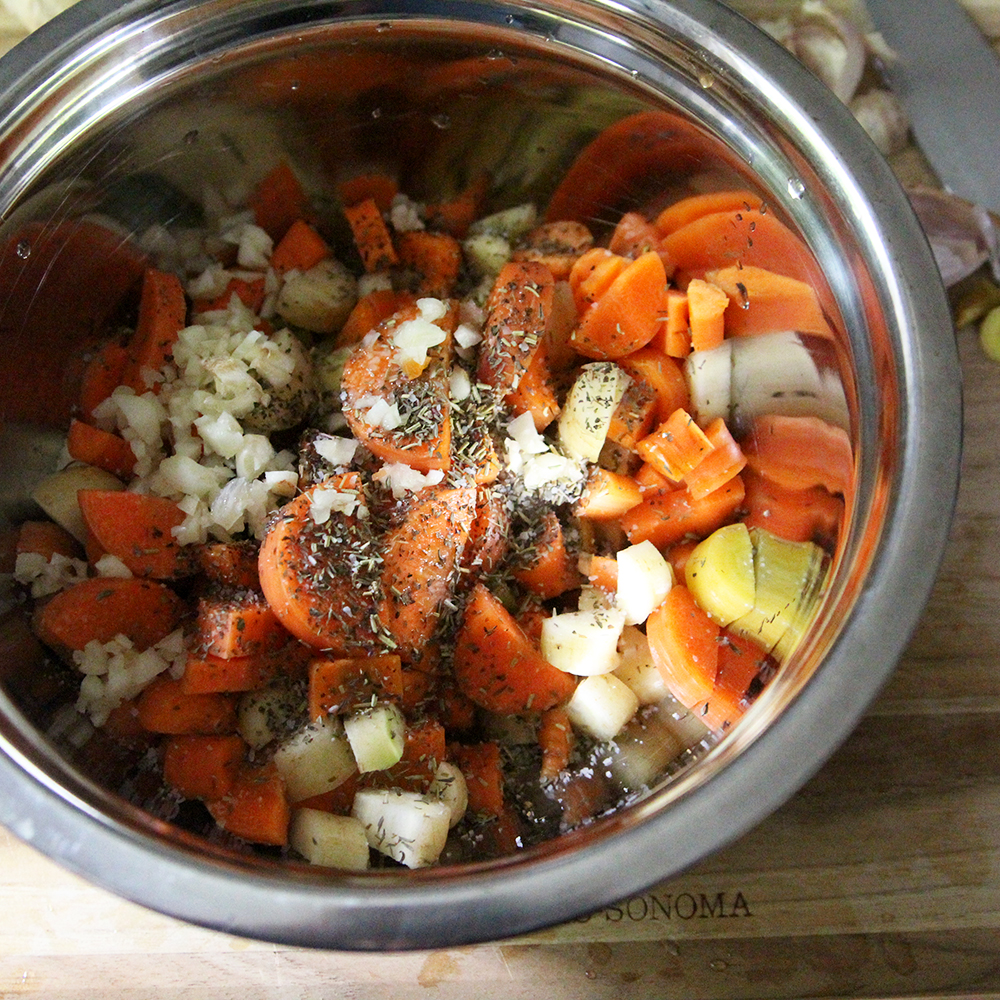
The carrots are then mixed with a trio of dried herbs – basil, thyme and rosemary – as well as salt, olive oil and garlic. Mix them up really well so the carrots are evenly coated.
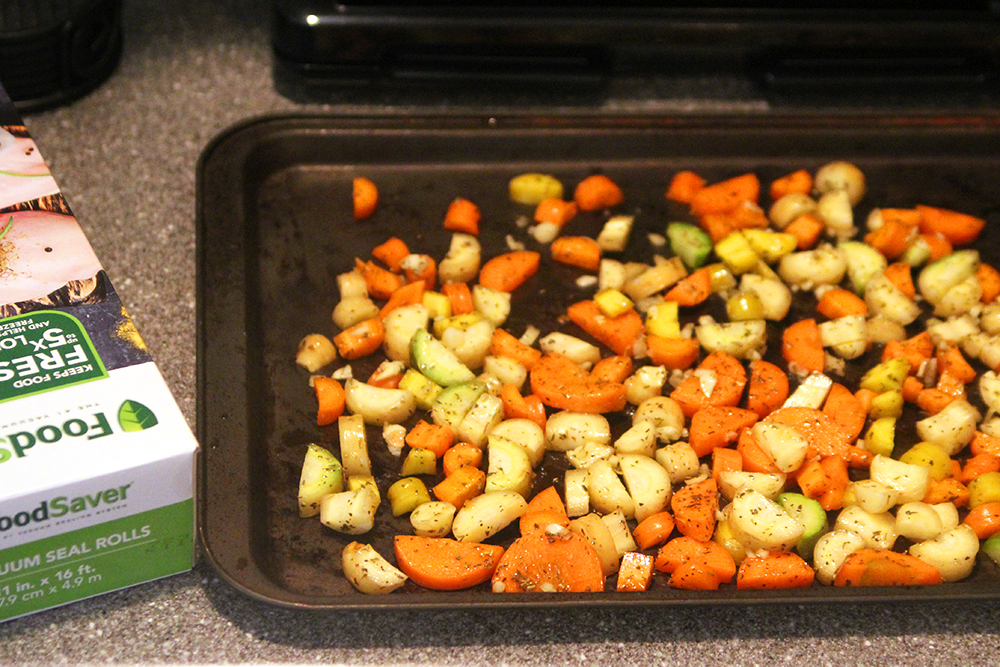
Spread the carrots out on a baking sheet in one layer. They'll bake for 20 minutes without being disturbed before stirring them and baking for an additional 5 to 10 minutes. I like to cook them to al dente, but if you want them softer, cook them for the longer time.
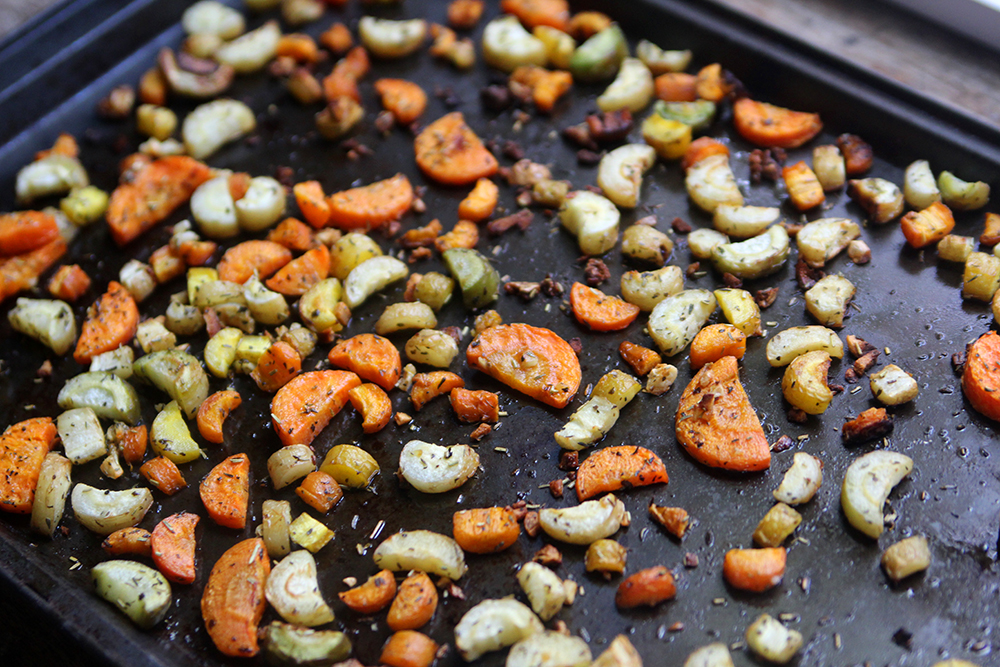
Once the carrots are done cooking, remove from the oven.
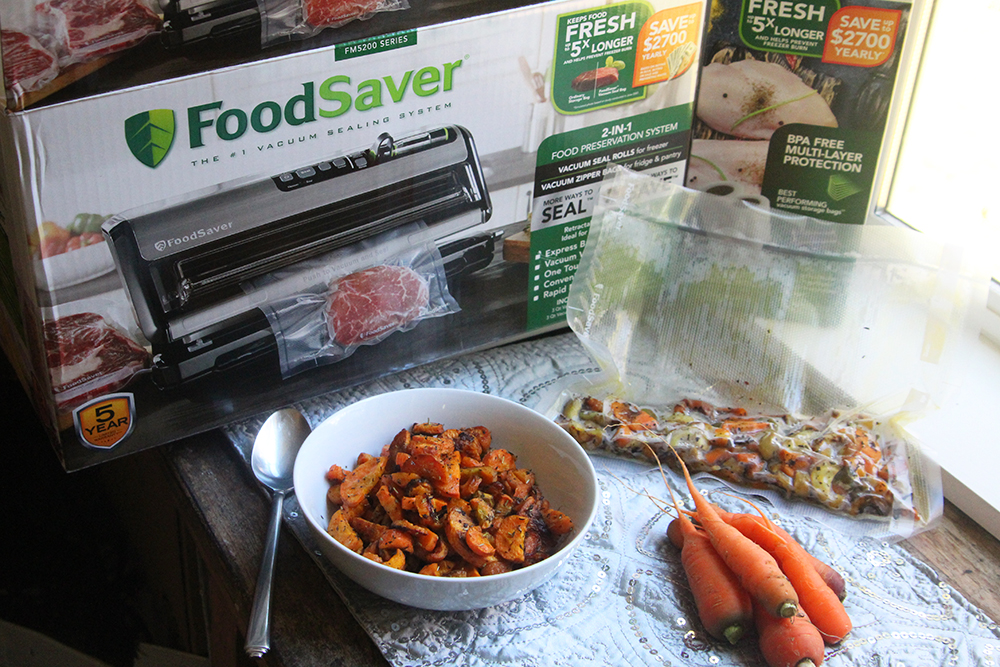
You can now either serve them immediately or store them for serving later, as I did.
Cooking Ahead
What I love about recipes like this – and being able to freeze them for later – is that it can take some of the stress out of dinnertime. Side dishes featuring veggies cooked in flavorful ways are a must for every meal we eat. In the summertime that means putting out a bowl of the tomatoes we've grown or slicing up cucumbers – the cool, fresh veggies are such a treat.
But when the weather turns cold, having warm, well-seasoned sides makes the dinner infinitely better. Warm foods are a must to combat the chill in the air, I think.

Roasted Carrots with Garlic and Herbs
Ingredients
- 1 lb carrots, , halved length-wise and cut into ¼-1/2 inch half moons
- 2 tablespoon olive oil
- ½ teaspoon dried basil
- ½ teaspoon dried thyme
- ½ teaspoon dried rosemary
- ½ teaspoon kosher salt
- 2 cloves garlic, , minced
Instructions
- Preheat oven to 400 degrees Fahrenheit.
- In a mixing bowl, stir together the carrots, olive oil, dried basil, dried thyme, dried rosemary, kosher salt and garlic until the carrots are well-coated. Spread onto a nonstick baking sheet.
- Slide the baking sheet into the preheated oven and bake for 20 minutes without disturbing. Stir well and then shake to evenly distribute the carrots. Return to the oven and bake for an additional 5-10 minutes to desired tenderness.
Where to find the FoodSaver®
Both the FoodSaver® FM5200 Vacuum Sealing System and the FoodSaver® 11" x 16' Vacuum Seal Roll, 2 Pack are available at Walmart, where you can find it in the Home section near the food storage products.
It's also available online where there's a special online Rollback offer right now. Through Dec. 22, 2018, you can purchase the FoodSaver® FM5200 Vacuum Sealing System for $142.99 (original price $169) and the FoodSaver® 11" x 16' Vacuum Seal Roll, 2 Pack for $15.99 (original price $17.98). Both are online-only deals.

Your carrots look great! Ours aren't ready for harvest yet.